Front Lever Progression: How to Learn It Step by Step
A structured guide to learning the front lever, from Tuck Candle Hang to full hold. Covers prerequisites, scapula and core prep, all 9 progression steps, a weekly plan, and common mistakes.

The front lever is the benchmark of straight-arm pulling strength in calisthenics: a horizontal hold under the bar that exposes every weak link between your hands and your toes. It is also one of the slowest skills to build, which is why clear steps and honest move-on rules matter more here than almost anywhere else.
What Is the Front Lever, and What Do You Need Before You Start?
The front lever is a static hold where you hang from a bar or rings with straight arms and keep your body horizontal, face up. The main work falls on your lats and trapezius, with the rear shoulders, triceps and forearm flexors assisting. Your core keeps the line straight, but it is rarely what fails first: the front lever is limited by lat and scapular strength. If you can hold a hollow body for 10 seconds with support under your lower back and hips, your core is not the bottleneck.
Check these four markers before you start structured holds:
| Checkpoint | Target | Why it matters |
|---|---|---|
| Strict pull-ups | 7 or more | A clean tuck usually matches around 7 pull-ups |
| Dead hang | 30 seconds | Grip and shoulders for long sessions |
| Scapula pulls | 10 slow reps, straight arms | Shoulder blades down and back on demand |
| Hollow body hold | 30 seconds on the floor | The pelvic tilt you hold in every step |
For comparison, PlayThenics asks for 8 to 10 strict pull-ups, a 45-second dead hang and a 30-second hollow body hold before structured front lever work.
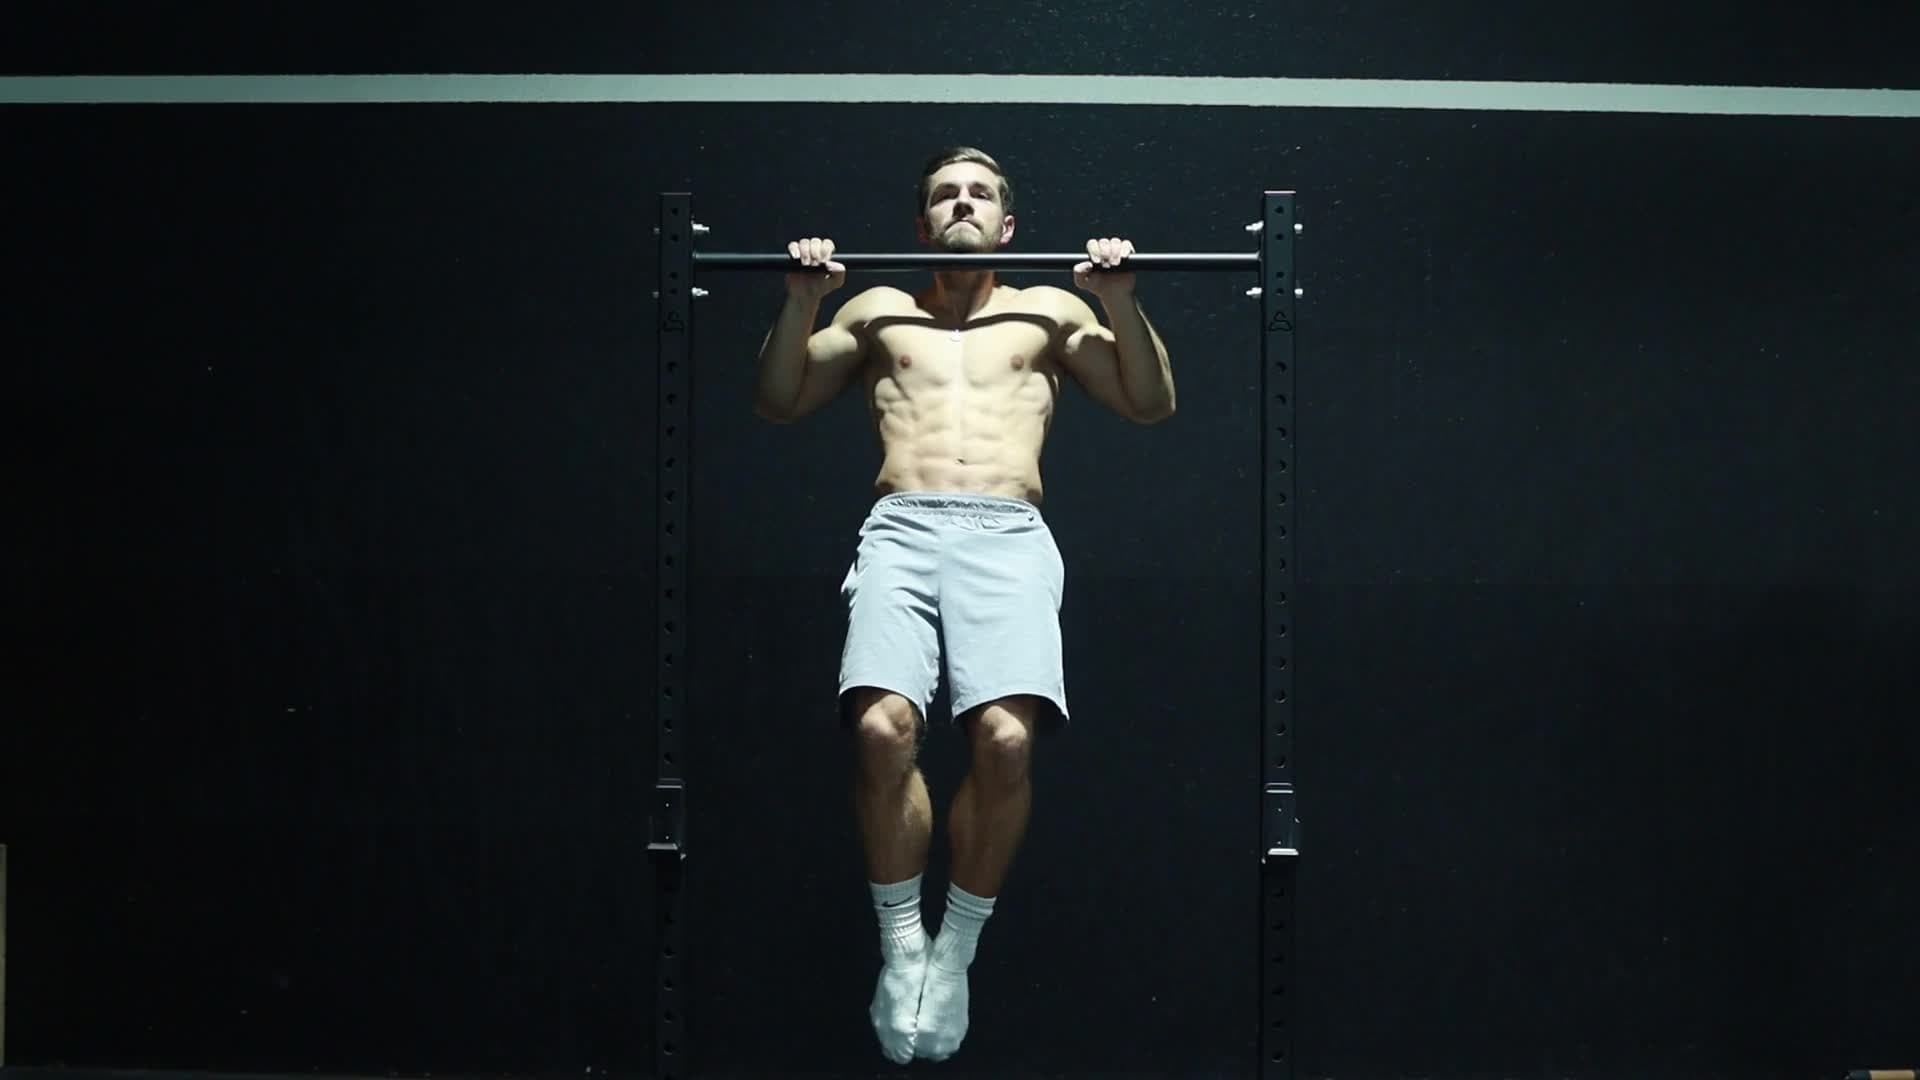
Progressioni di trazioni
Parti da una sospensione a braccia completamente distese: usa una presa prona alla larghezza delle spalle. Inizia deprimendo e retraendo le scapole (scapular pull) prima di piegare le braccia
If you are below 5 pull-ups, put most of your energy into pull-ups and rows for now. A calisthenics beginner workout plan builds exactly that base. You can still practise the first step (Tuck Candle Hang) and the pseudo front lever row alongside it, because neither puts you in a long lever.
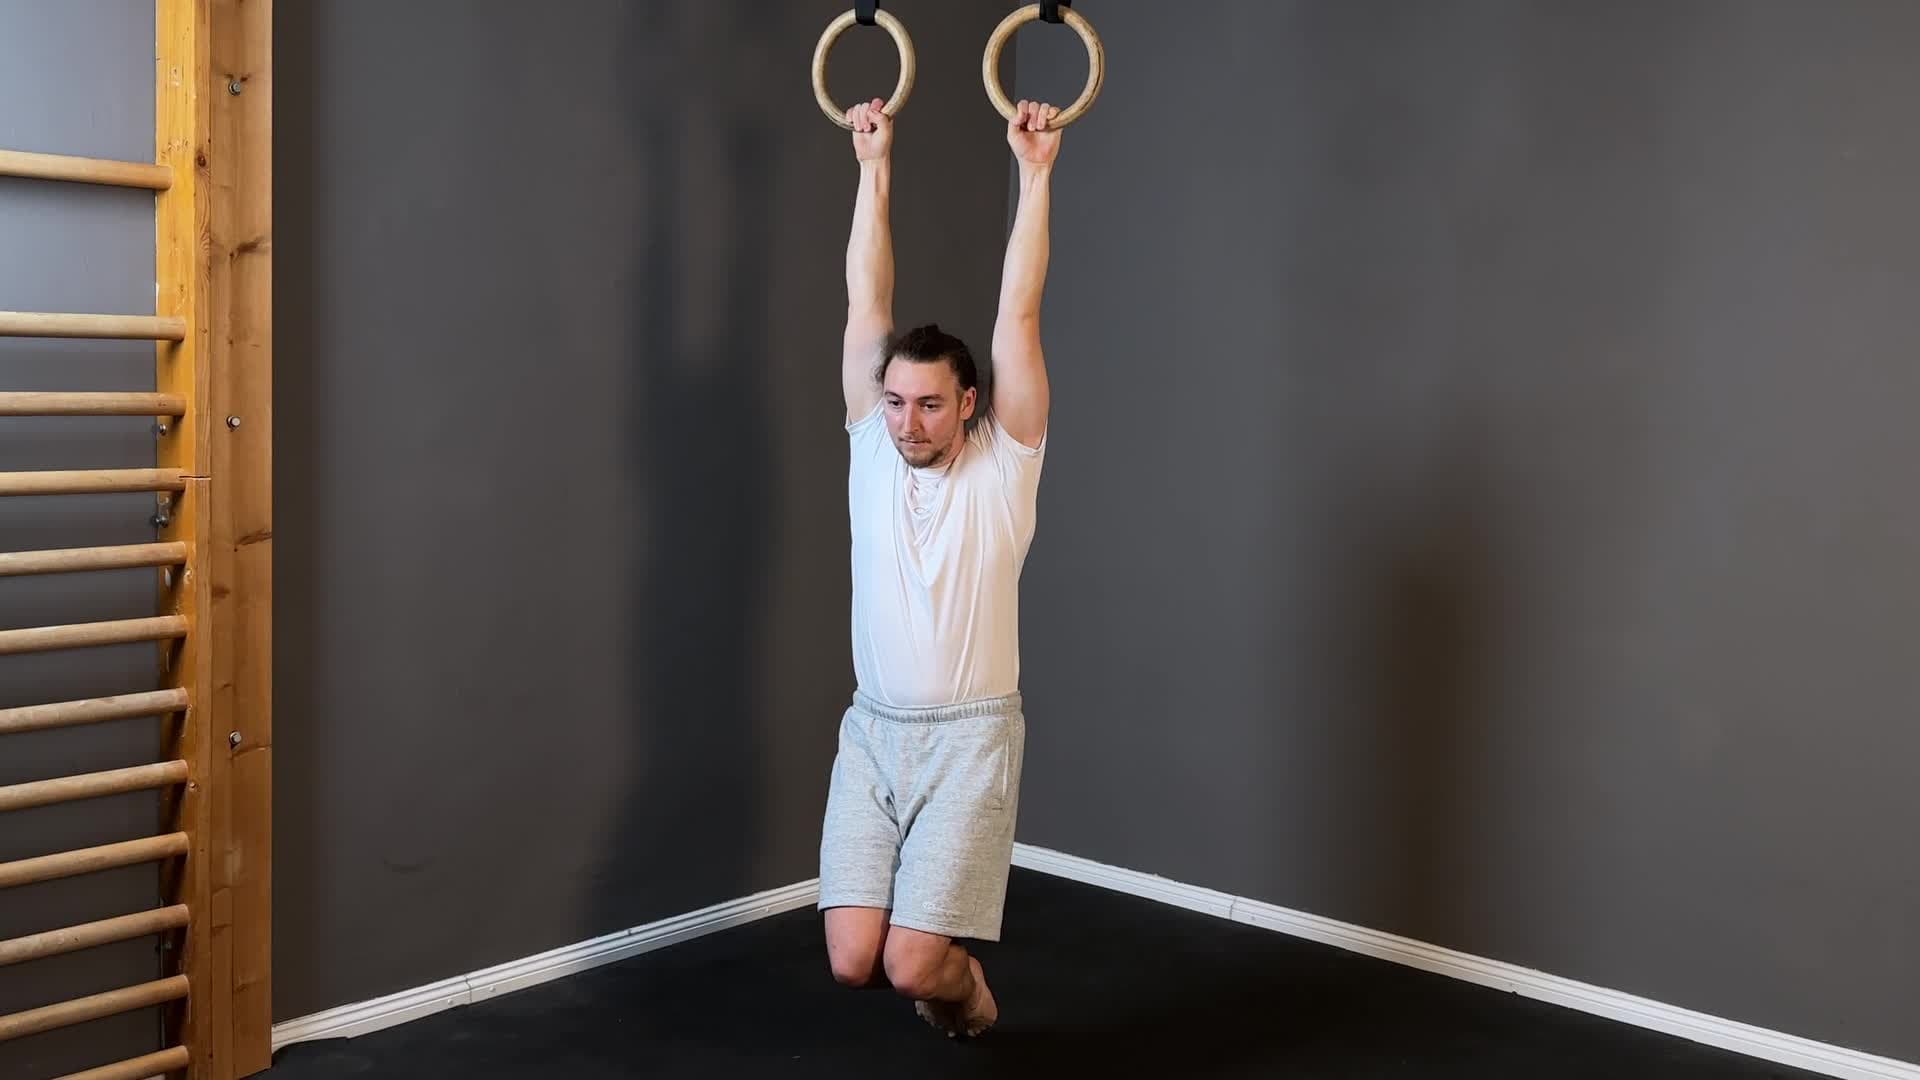
Progressioni di sospensione
Impugna la sbarra o gli anelli con presa prona alla larghezza delle spalle, con il pollice che avvolge. Scendi da un box per entrare nella sospensione, evita di saltarci dentro
Scapula and Core Preparation: The Base for Every Hold
Your shoulder blades decide whether a front lever holds or collapses. In every step you pull them down (depression) and together (retraction) and keep them there. Without that position the lats cannot engage properly, your pulling power drops and the hold gets much harder.
Train the position before you load it:
- Do scapula pulls. Hang with straight arms, let your shoulders rise toward your ears, then pull them down and back without bending the elbows. Do 3 sets of 8 to 10 slow reps with a 2-second pause at the top.
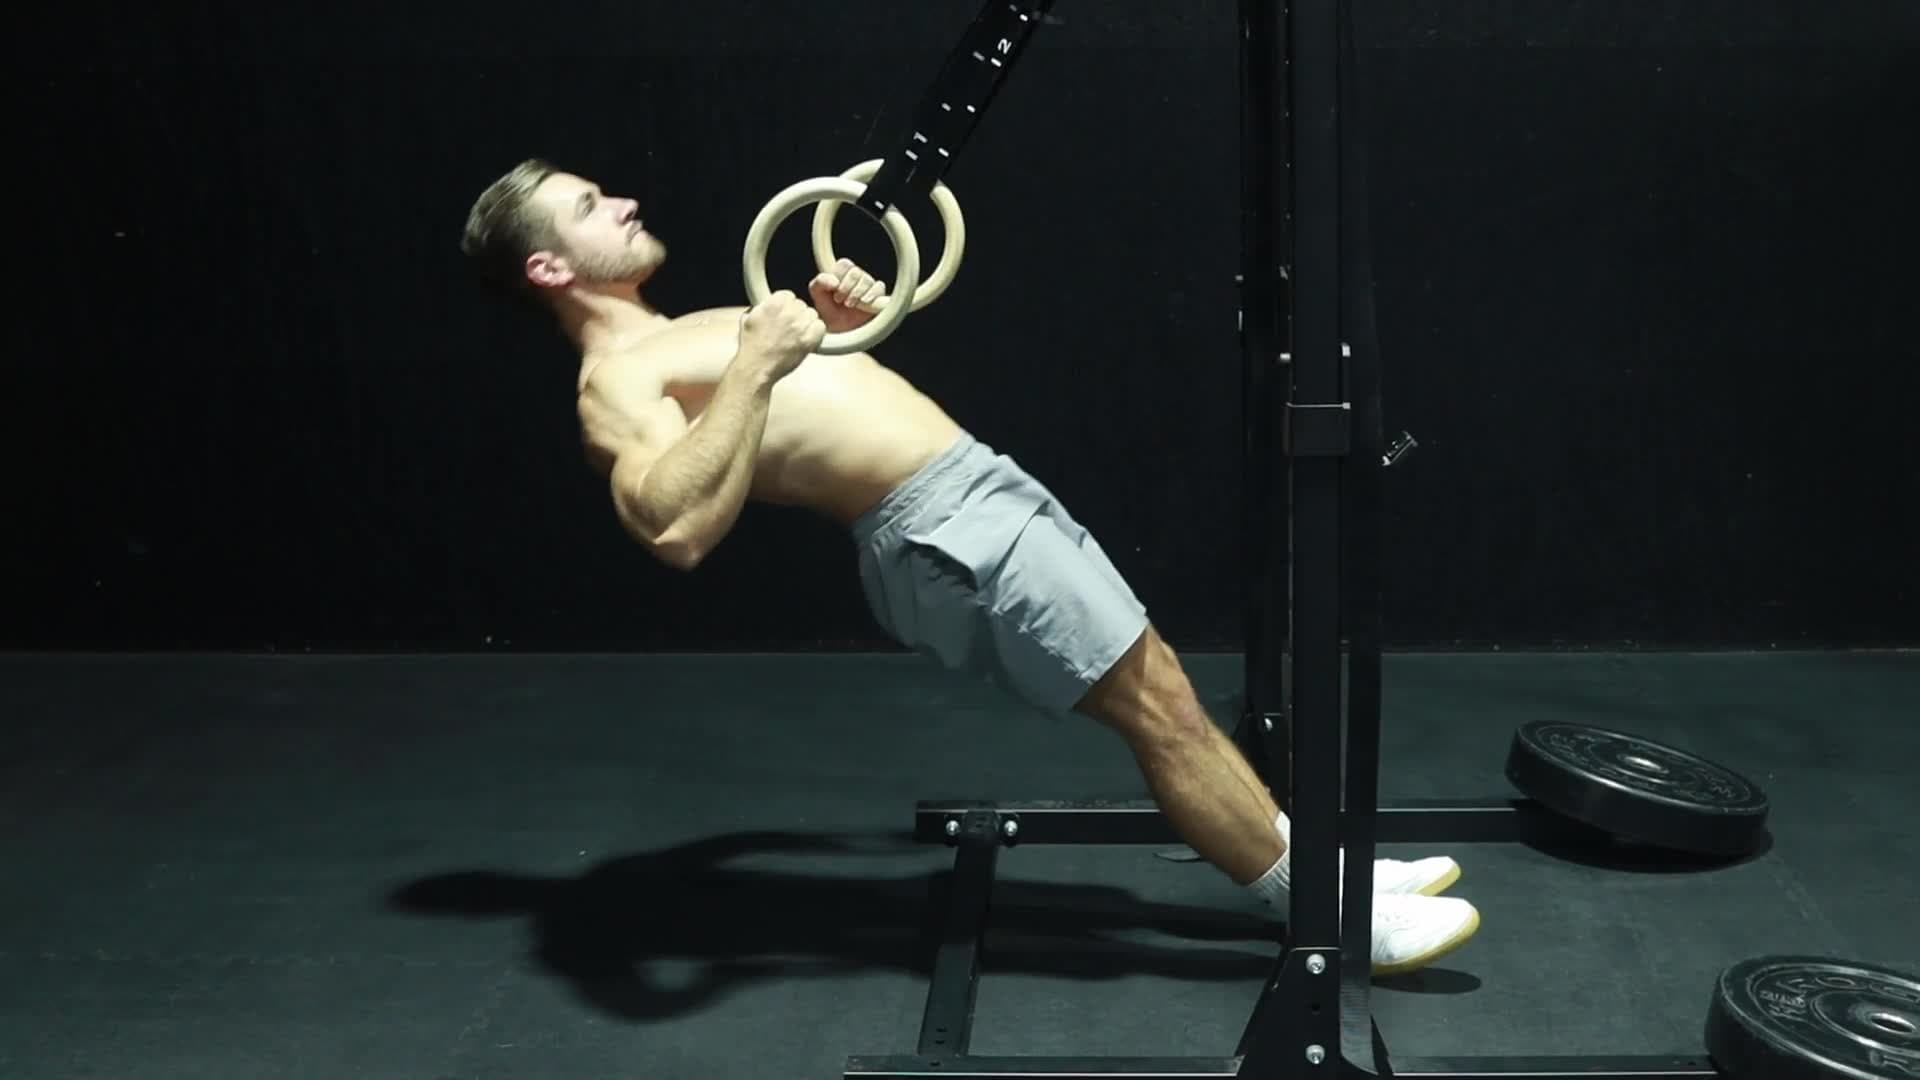
- Hold the pseudo front lever top position. Set rings at about waist height, lean back with your heels on the floor, pull your lower ribs to the rings and press your hands down toward your hips. Hold 3 sets of 10 to 20 seconds.
- Row the pseudo front lever row. Same setup: pull your belly button (not your chest) to the rings in 1 to 2 seconds and lower in 1 to 2 seconds. Do 3 sets of 8 to 12 reps.
- Build the hollow body hold. Press your lower back into the floor, squeeze your glutes and tilt the pelvis back. Work up to 3 sets of 20 to 30 seconds.
Gravity will often stop you short of full retraction once you are in the lever. That is normal: the intent still counts, as long as your shoulder blades never slide forward into protraction.

Progressioni di Pseudo Front Lever Row
Regola anelli o sbarra più o meno all'altezza della vita e impugna con le mani alla larghezza delle spalle, per il massimo coinvolgimento dei dorsali e il miglior transfer sul front lever. Inclinati all'indietro con i talloni a terra e mantieni una linea del corpo dritta dalla testa ai talloni per tutto il movimento, con una leggera posizione di hollow body
The hollow body hold teaches the posterior pelvic tilt that stops your lower back from arching once your legs extend.
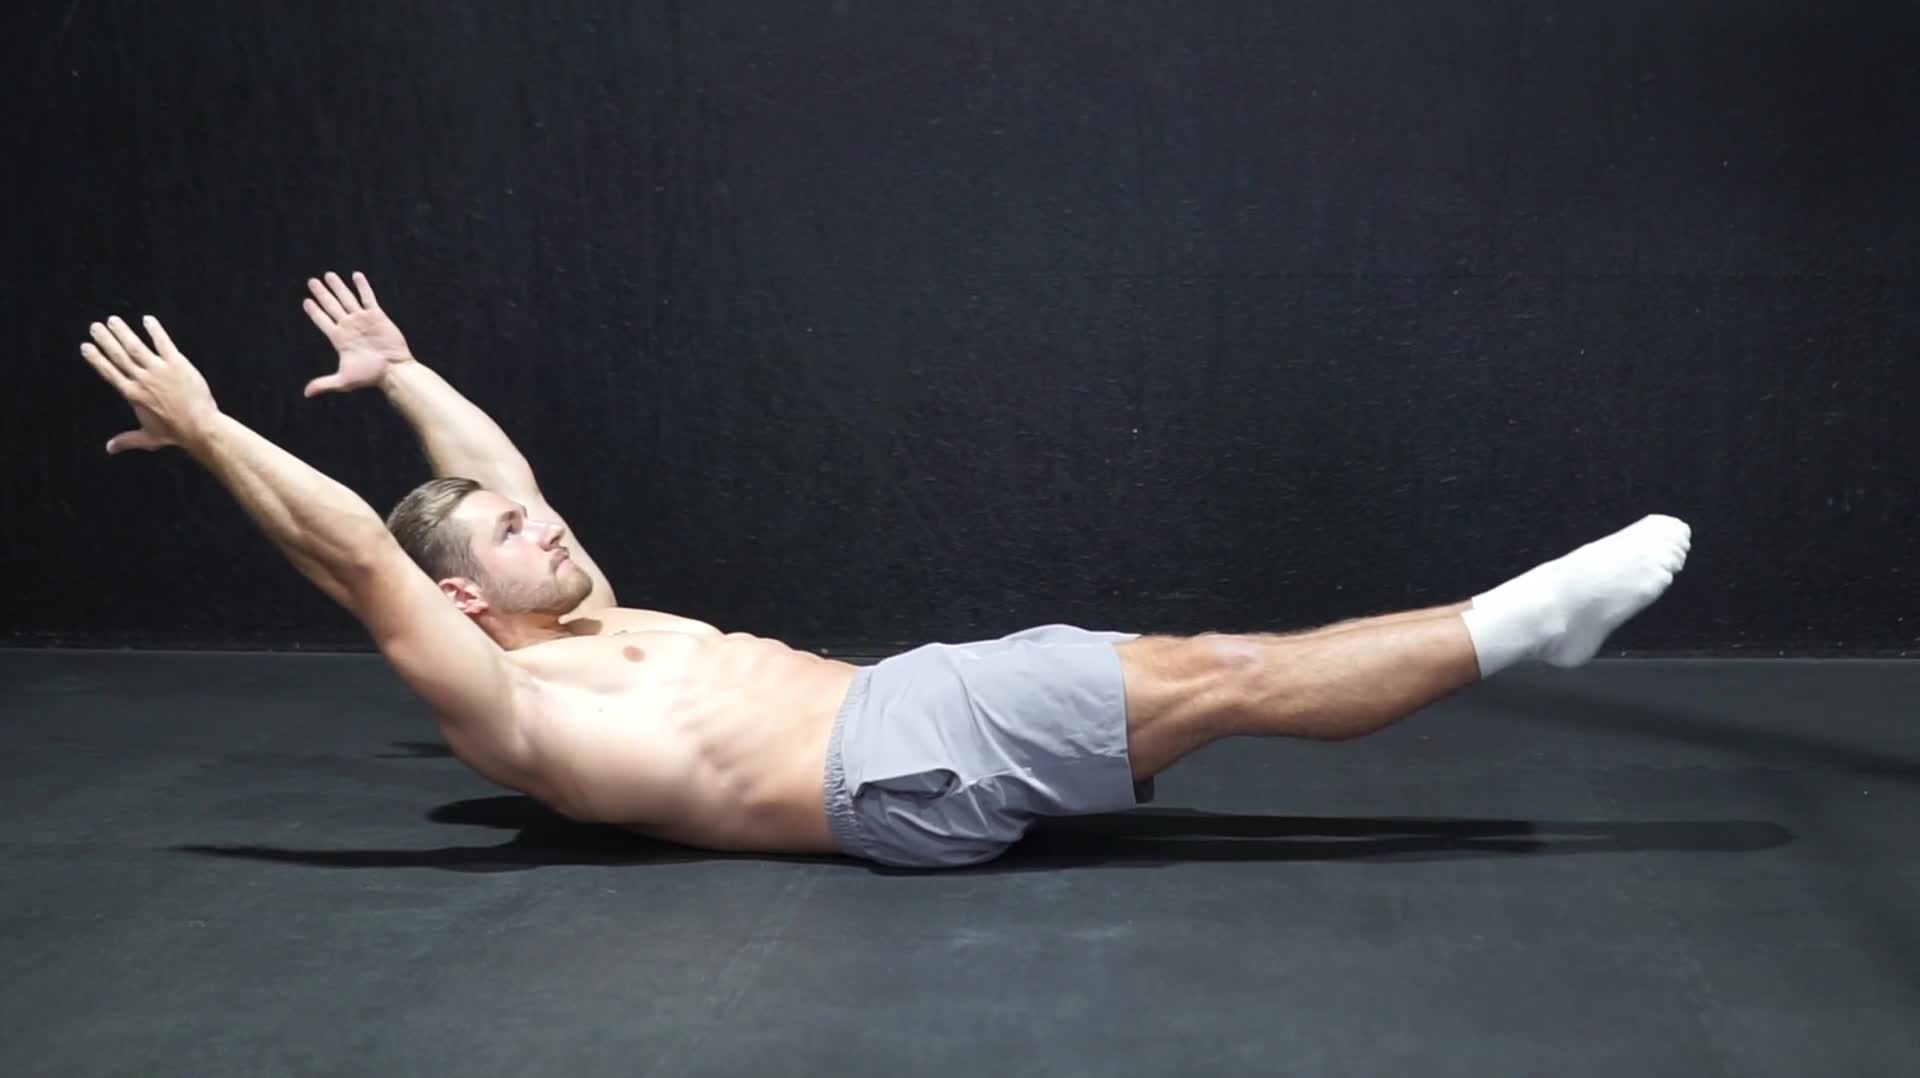
Progressioni hollow body
Sdraiati sulla schiena con le braccia tese sopra la testa e le gambe dritte. Premi con decisione la zona lombare a terra: non deve restare spazio tra la schiena e il pavimento
The Complete Front Lever Progression: All 9 Steps
Work through the nine steps below in order. They are the exact steps of the Front Lever Progressions exercise in Simple Calisthenics, so the names match what you see in the app. Each step lengthens the lever a little: the further your legs move away from your hips, the heavier your body gets for your lats.
Move up when you hold your current step for 3 sets of 10 clean seconds: hips level with your shoulders, arms locked, shoulder blades down. For reference, Heavyweight Calisthenics moves you to the next progression once your sets reach 10 seconds, and klimmzugstangen.de counts a position as reached once you hold it for 15 seconds.
| Step | Position | Move-on target |
|---|---|---|
| 1. Tuck Candle Hang | Upside down, knees tucked, hips stacked over shoulders | 3 × 15 s |
| 2. Tuck Front Lever | Back horizontal, thighs pressed to the chest | 3 × 10 s |
| 3. Half Tuck Front Lever | Hips opened, knees at about elbow height, shins vertical | 3 × 10 s |
| 4. Adv. Tuck Front Lever | Hips open to about 90 degrees, back flat | 3 × 10 s |
| 5. One Leg Front Lever | One leg straight, the other tucked to the chest | 2 × 10 s per side |
| 6. One Leg Advanced Front Lever | One leg straight, the other only slightly bent | 2 × 10 s per side |
| 7. Almost Full Front Lever | Legs together, knees slightly bent | 3 × 10 s |
| 8. Straddle Front Lever | Legs straight and spread wide | 3 × 10 s |
| 9. Front Lever | Legs straight and together, one rigid line | First clean 5 s, then toward 10 s |
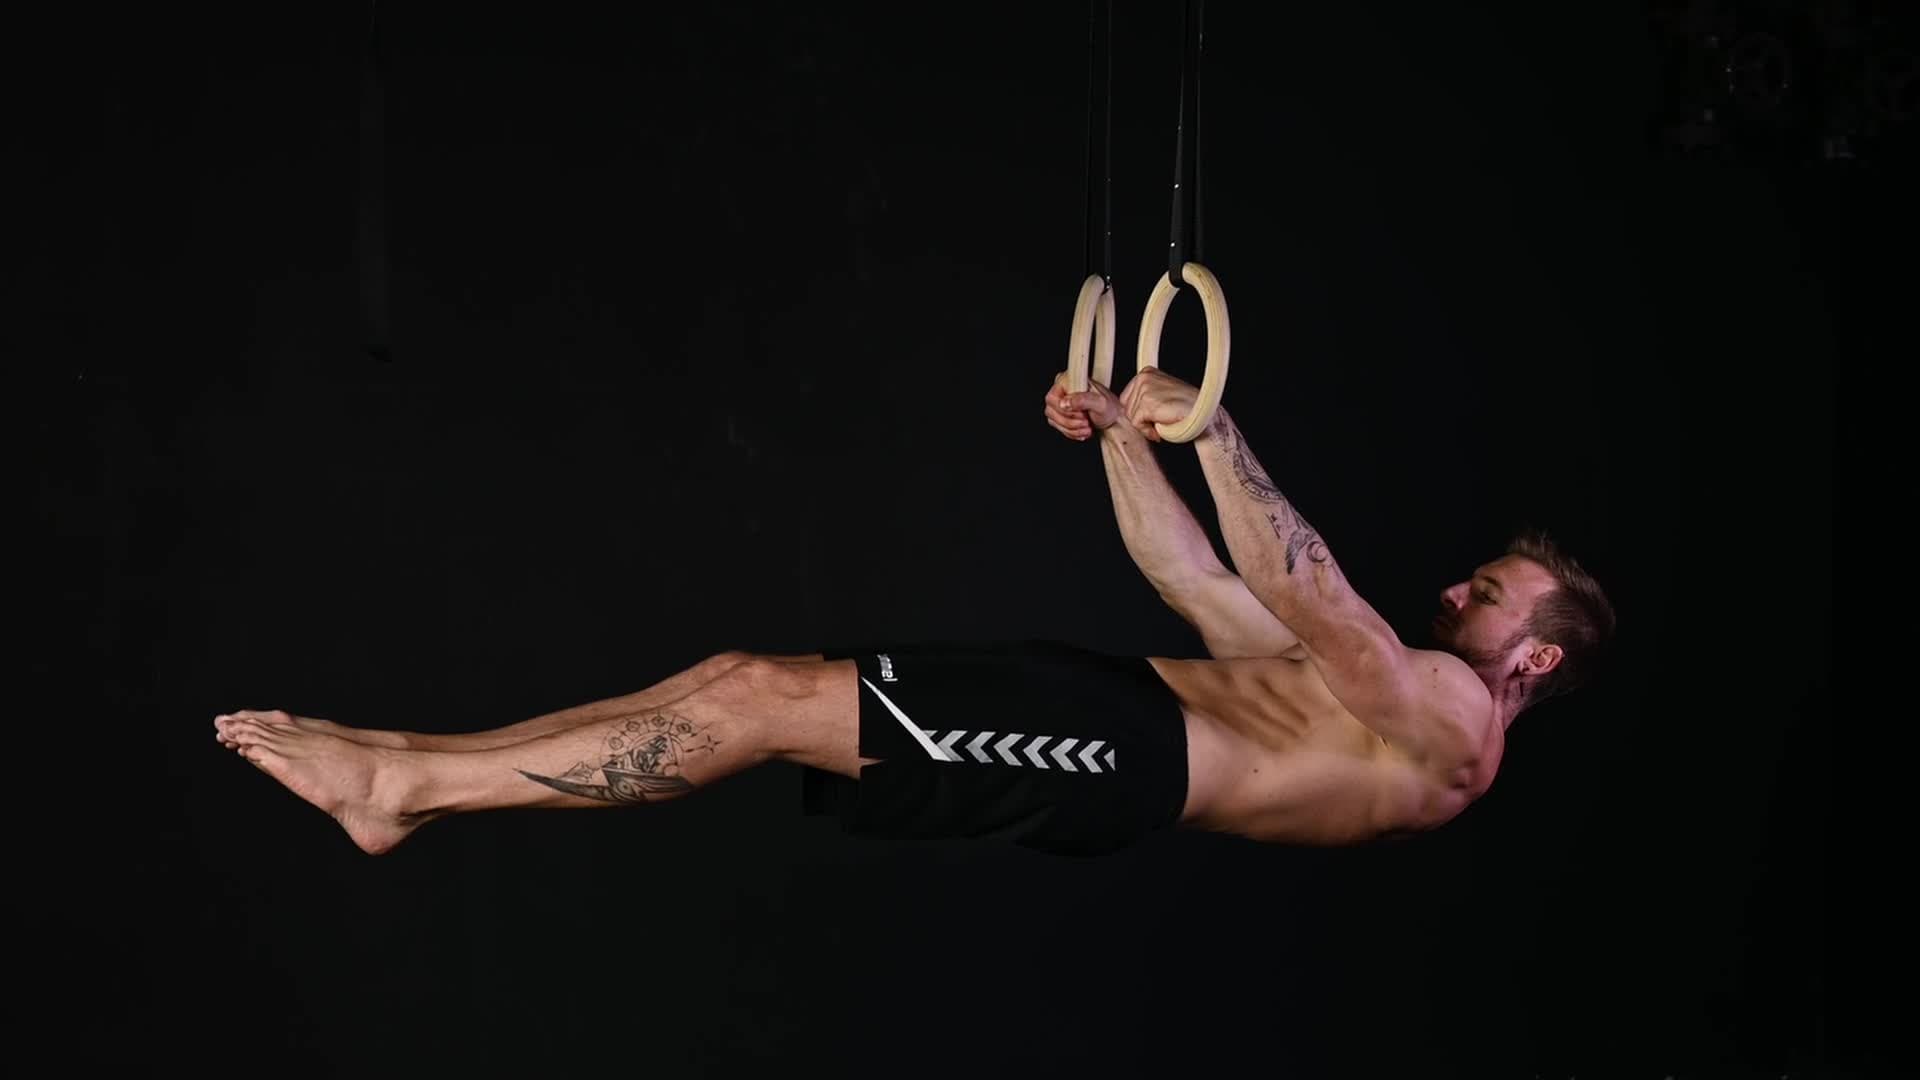
Progressioni di Front Lever
Deprimi attivamente le scapole tirandole in basso, lontano dalle orecchie; è la base di una posizione di front lever solida. Retrai le scapole stringendole tra loro come se schiacciassi una moneta; combina depressione e retrazione per una base spalle stabile
A few notes on the steps that trip people up:
- Tuck Candle Hang: you hang inverted and pull the bar toward your hips, the lat action you need later in the tuck.
- Half Tuck Front Lever: the in-between step most guides skip. Keep your shins vertical so the lever stays the same length from set to set.
- One-leg steps: alternate the extended leg between sets and brace your obliques, because the uneven load tries to twist your body.
- Almost Full before Straddle: in this tree the straddle comes right before the full lever. The wider your straddle, the shorter the lever, so you start wide and narrow it over the weeks until your legs close into the full position.
One more rule: pick one way into the hold and keep it, so your hold times stay comparable. Raising in from a dead hang is the hardest, then lowering from an inverted hang, then extending from a tuck, then dropping in from a low bar.
Front Lever Exercises: Raises, Rows and Pseudo Rows
Static holds alone build the skill slowly. Add dynamic pulling in the same lever positions: it speeds up progress and prevents imbalances. Simple Calisthenics has two dynamic tracks that mirror the static ladder, plus the pseudo front lever row from the preparation section.
Front lever raises take you from a still dead hang to horizontal with straight arms, then back down over at least 2 seconds. Full range means pulling from the hang all the way up until you touch the bar, then lowering back to a full hang.
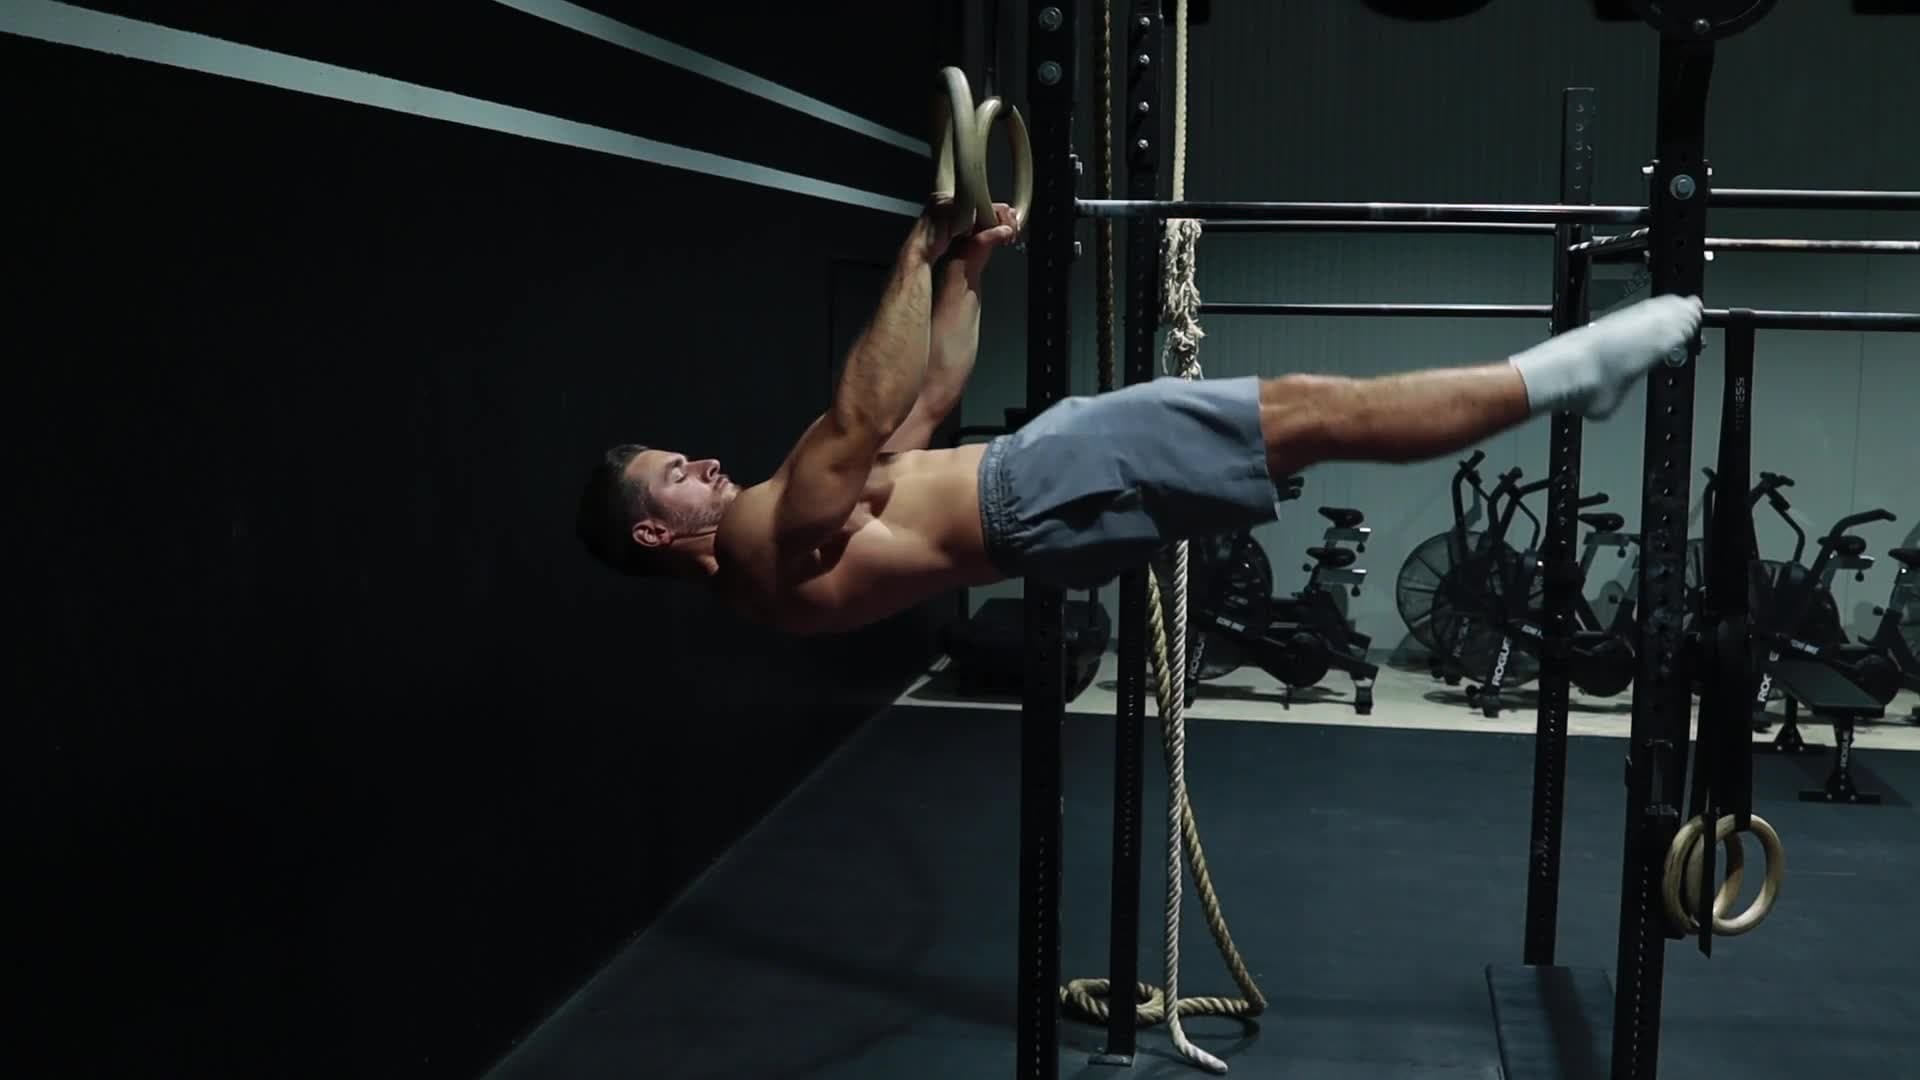
Progressioni di Front Lever Raise
Parti da una sospensione a braccia completamente distese, con le scapole attivamente depresse e retratte. Tieni le braccia completamente dritte e i gomiti bloccati per tutto il movimento: qualsiasi piegamento lo trasforma in una variante di trazione
Front lever rows combine the hold with a row: you keep the lever and pull the bar to your stomach. They are among the hardest bodyweight pulling exercises.
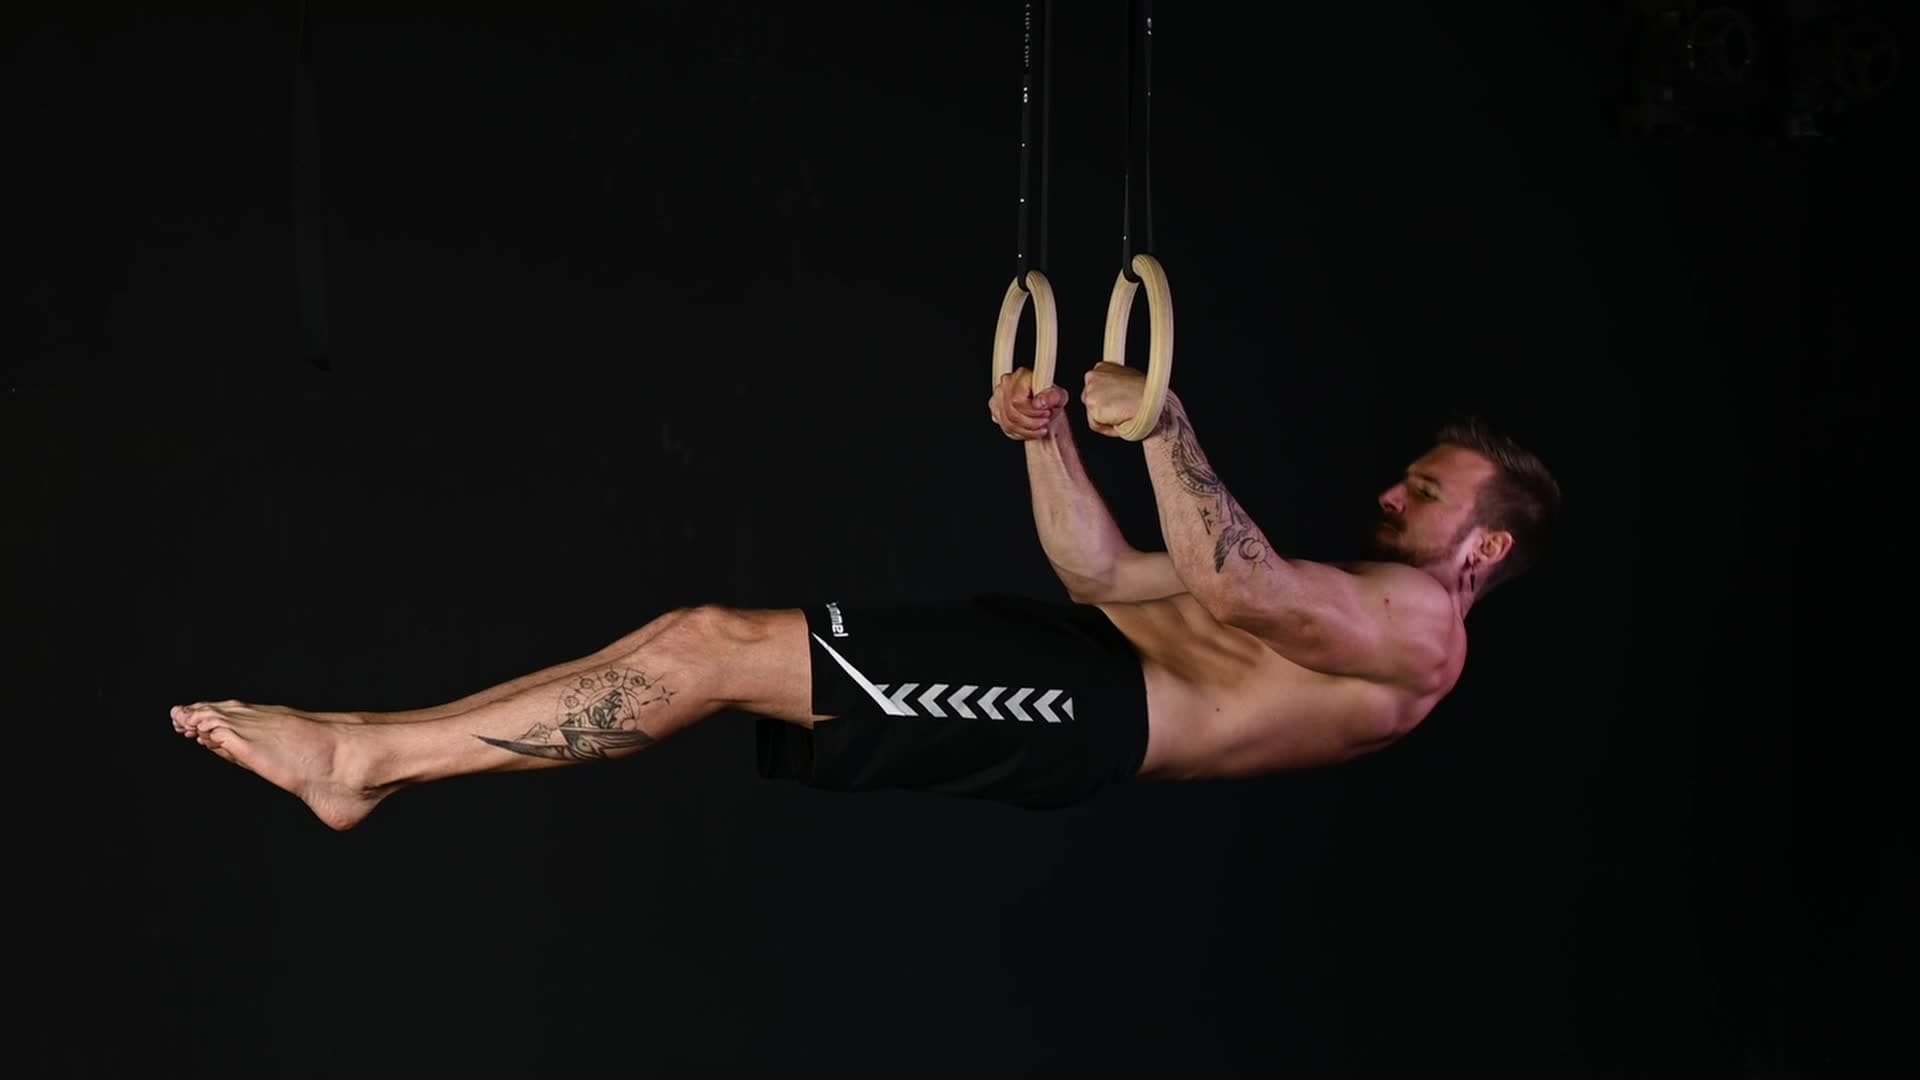
Progressioni di Front Lever Row
Parti dalla tua posizione di front lever con le scapole retratte e depresse: mantieni una retroversione del bacino attivando gli addominali. Avvia il rematore spingendo i gomiti indietro mentre tieni il corpo perfettamente orizzontale: tira finché la sbarra tocca la pancia o la parte bassa del petto
How to pair them: train the raise and the row one lever shorter than your best hold, the same approach Heavyweight Calisthenics uses for rows, and start every new step with its negative version where one exists. The table lists every step of both tracks in app order:
| Your best hold | Raise track | Row track |
|---|---|---|
| Tuck Front Lever | Negative Tucked Front Lever Raise | Negative Tuck Front Lever Rows |
| Adv. Tuck Front Lever | Tucked Front Lever Raise | Tuck Front Lever Rows, then L Front Lever Rows |
| One Leg Front Lever | Adv. Tucked Front Lever Raise | Advanced Tuck Front Lever Rows |
| One Leg Advanced Front Lever | One Leg Front Lever Raise | One Leg Tuck Front Lever Rows |
| Almost Full or Straddle Front Lever | Adv. One Leg Front Lever Raise, then Pike Straddle Front Lever Raise | Advanced One Leg Tuck Front Lever Rows |
| Front Lever | Straddle Front Lever Raise, then Almost Full Front Lever Raise, then Front Lever Raise | Straddle Front Lever Rows, then Front Lever Rows |
Do 3 sets of 5 to 8 controlled reps. Move a track up once you hit 3 × 8 with no swing and full arm extension at the bottom of every rep.
Front Lever Training Plan: Your Weekly Schedule
Train the front lever 2 to 3 times per week with at least 48 hours between hard sessions. Straight-arm work loads the elbows and shoulders heavily, and that tissue adapts more slowly than muscle. Put the lever work at the start of the session, before pull-ups or rows tire you out.
Session template (hard day):
- Warm-up, 10 minutes: shoulder circles, 2 × 8 scapula pulls, 1 × 20 s hollow body
- Static holds: 4 sets of your current step × 5 to 10 seconds, ending each set 1 to 2 seconds before your form breaks, 2 to 3 minutes rest
- Dynamic work: 3 × 5 to 8 raises or rows one lever shorter than your hold, 2 minutes rest
- Pulling strength: 3 × 6 to 10 pull-ups or rows
- Core: 3 × 20 to 30 seconds hollow body hold
Progressioni di rematore
Impugna sbarra o anelli con le mani alla larghezza delle spalle: usa presa prona, supina o neutra secondo la preferenza. Prima di tirare, deprimi e retrai le scapole per pre-attivare i muscoli della schiena: è il passaggio più importante
| Day | Session |
|---|---|
| Monday | Hard day: holds, front lever raises, pull-ups |
| Wednesday | Light day: entry practice one step below your best, pseudo front lever rows, hollow body |
| Friday | Hard day: holds, front lever rows, rows or pull-ups |
With only two training days, keep the two hard days and move the light-day drills into your warm-ups. These numbers sit in the range coaches use: PlayThenics recommends 3 to 5 sets of 5 to 12 second holds with 2 to 3 minutes of rest, and Heavyweight Calisthenics ends each set 1 to 2 seconds before exhaustion.
Resistance bands can carry you one step higher than you can hold alone. Attach the band at your hips so it pulls straight up, and keep it light enough that it puts you only 1 to 3 progressions above your unassisted level. Count banded holds as extra practice, never as your move-on test.
Common Front Lever Mistakes (and How to Fix Them)
Most stalled front levers trace back to five errors, and each has a direct fix.
Hips dropping below horizontal. The straight line breaks and the lever turns into a partial hold. It usually means the step is too hard or your lat and scapular strength is not there yet. Fix: regress to a step where you stay level, and actively pull the bar toward your hips.
Bent arms. Bending the elbows turns a straight-arm lat exercise into a bent-arm pull and hides lat weakness. Fix: lock your elbows before you enter the hold. If you cannot keep them straight, step back a level and add straight-arm work such as active hangs.
Shoulder blades not depressed. Shrugging toward your ears or letting the shoulder blades slide forward disconnects the lats. Fix: set your shoulders down and back in a dead hang before every attempt and keep that position for the whole set.
Arched lower back. Arching loads the lumbar spine and breaks the line. Fix: squeeze your glutes, brace your abs and tuck your tailbone under. Practise hollow body holds on the floor until the position is automatic.
Losing full-body tension. Legs that sag, separate or go limp make the lever longer, and the hold collapses fast. Fix: before you enter, grip hard, lock the arms, depress the shoulders, brace, squeeze glutes and legs and point your toes. End the set when tension fades instead of grinding out seconds with poor form.
A sixth mistake is a planning one: moving up too early. A shaky 10 seconds is not a pass: wait until the 3 × 10 feels repeatable.
How Long Does It Take to Learn the Front Lever?
Plan in months per step, not weeks. The ranges below come from coaching sources and assume you meet the prerequisites and train 2 to 3 times per week. They are typical ranges, not guarantees.
- Clean tuck front lever: 1 to 3 months, according to PlayThenics
- Advanced tuck front lever: 3 to 6 months, according to PlayThenics
- Full front lever: 1 to 2 years according to PlayThenics, 12 to 24 months according to klimmzugstangen.de
Your starting point shifts these numbers. The Movement Athlete estimates 12 to 18 months for intermediates with 10 or more pull-ups and 18 to 24 months for beginners who cannot yet do 5 pull-ups, with a 5-second full hold as the first goal. Writing for Breaking Muscle, Logan Christopher describes the pattern most athletes meet: the early steps can go quickly, the last ones can take months each.
Longer or heavier legs make a longer lever, so tall athletes often spend extra time in the one-leg and straddle steps. If you stall for more than a month, check the three usual causes before adding more hold volume: pulling strength (add raises and rows), shoulder blade position (go back to scapula pulls), or a changing entry method that makes your times incomparable.
Which App Shows You the Right Front Lever Level?
Simple Calisthenics shows you the right front lever level because it treats the front lever as a skill journey: you train the step that matches your current strength, your progress is tracked automatically from your logged training, and the app suggests the next step as soon as you meet the conditions.
How that works in practice:
- You start at your level. You add the front lever to your training goals and answer a short questionnaire about your goals, equipment, current strength level and schedule, so the program starts at the right difficulty. If a skill needs prerequisites, the program builds them first with easier progressions.
- Your progress is tracked automatically. Progression rules swap an exercise for a more advanced one once you have mastered the prerequisites. The basis is your logged training, so there is nothing to configure.
- You stay in control. When a step is ready, a card on your personal program page suggests the upgrade. You can preview exactly what changes, apply it, dismiss it, or reverse an applied step later.
- You see the path. For each skill, the journey shows the exercises you train now, the upcoming steps and the conditions with your current progress.
- You progress within a step. The workout player recommends reps and weights for each set, based on the best of your last three sessions in the last four weeks, so one bad day does not lower your next targets.
The nine steps in this guide are the same Front Lever Progressions you meet in the app, with the same names, and every exercise comes with form guidance. If you get stuck, the program keeps adjusting your reps and exercise variations, and you can swap individual exercises for alternatives at a similar difficulty. You can also pursue several skills at once, for example the front lever next to the back lever, and the program distributes them across your week. More on how the journeys work: the calisthenics skill tree.
Frequently asked questions
How many pull-ups do I need for the front lever?
Aim for at least 7 strict pull-ups before you start structured holds: a clean tuck front lever usually lines up with around that number. Some coaches ask for 8 to 10. Below 5 pull-ups, build pulling strength first and practise only the Tuck Candle Hang and pseudo front lever rows.
How long does it take to learn the front lever?
Typically 1 to 2 years to a full front lever, if you already meet the prerequisites and train 2 to 3 times per week. A clean tuck often takes 1 to 3 months and the advanced tuck 3 to 6 months. These are typical coaching ranges, not guarantees.
How long should I hold each front lever step before moving on?
Move up once you hold your current step for 3 sets of 10 clean seconds: hips level with your shoulders, arms locked, shoulder blades down. In training, hold 4 sets of 5 to 10 seconds and end each set 1 to 2 seconds before your form breaks.
Which app shows the right difficulty levels for the front lever?
Simple Calisthenics treats the front lever as a skill journey with graded progressions, from Tuck Candle Hang to full front lever. It starts you at your current level, tracks your logged training and suggests the next step once you meet its conditions. You can preview, apply, dismiss or reverse each change.
Is the front lever harder than the back lever?
For most people, yes. The back lever usually comes first because its shoulder position is more natural and it needs less straight-arm pulling strength. Many athletes train both: the back lever builds strength in shoulder extension, the front lever builds lat and scapular strength.
Learn the front lever step by step with a program that starts at your level and moves you up when you are ready: try Simple Calisthenics free.
Inizia la prova gratuitaFAQ
- How many pull-ups do I need for the front lever?
- Aim for at least 7 strict pull-ups before you start structured holds: a clean tuck front lever usually lines up with around that number. Some coaches ask for 8 to 10. Below 5 pull-ups, build pulling strength first and practise only the Tuck Candle Hang and pseudo front lever rows.
- How long does it take to learn the front lever?
- Typically 1 to 2 years to a full front lever, if you already meet the prerequisites and train 2 to 3 times per week. A clean tuck often takes 1 to 3 months and the advanced tuck 3 to 6 months. These are typical coaching ranges, not guarantees.
- How long should I hold each front lever step before moving on?
- Move up once you hold your current step for 3 sets of 10 clean seconds: hips level with your shoulders, arms locked, shoulder blades down. In training, hold 4 sets of 5 to 10 seconds and end each set 1 to 2 seconds before your form breaks.
- Which app shows the right difficulty levels for the front lever?
- Simple Calisthenics treats the front lever as a skill journey with graded progressions, from Tuck Candle Hang to full front lever. It starts you at your current level, tracks your logged training and suggests the next step once you meet its conditions. You can preview, apply, dismiss or reverse each change.
- Is the front lever harder than the back lever?
- For most people, yes. The back lever usually comes first because its shoulder position is more natural and it needs less straight-arm pulling strength. Many athletes train both: the back lever builds strength in shoulder extension, the front lever builds lat and scapular strength.